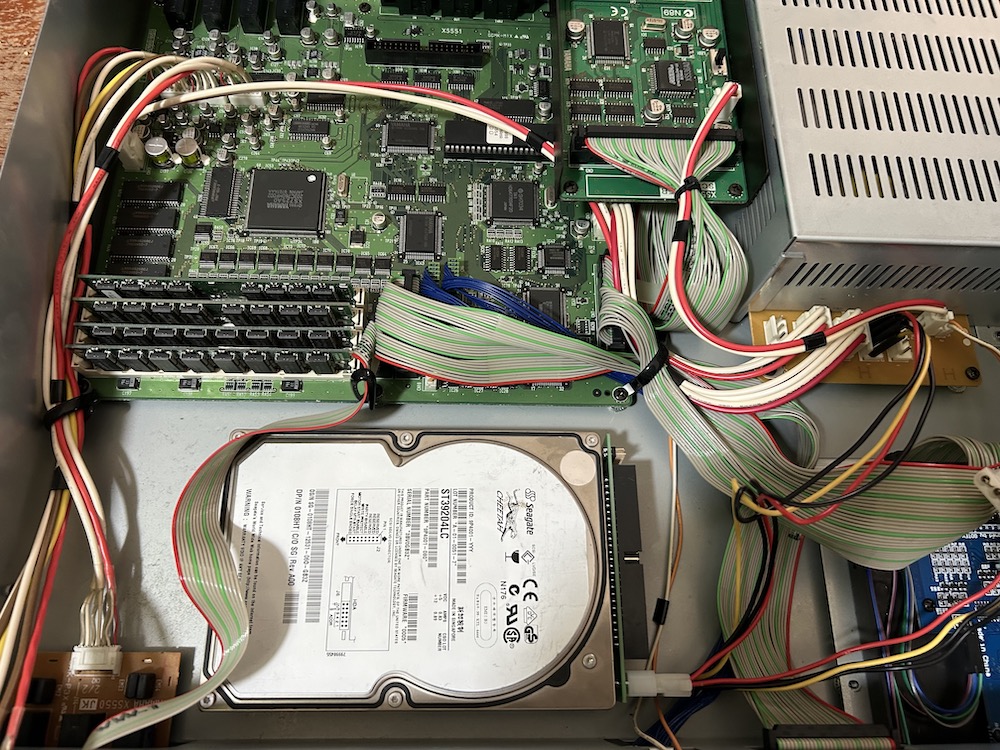
I recenlty got a Yamaha A3000 and I wanted to install a SCSI Hard Drive in it. Since I had a 68-pin SCSI Drive I decided t use this, but since the Yamaha has an internal 50-pin connector, I had to buy a 50 to 68 pin converter on Amazon.
Also, I didn't have the original power supply connector for the Hard Disk, that was supplied when the A3000 came out. You can find them on ebay or similar, but usually at about 20 euros/dollars apiece, so I decided to do it my way
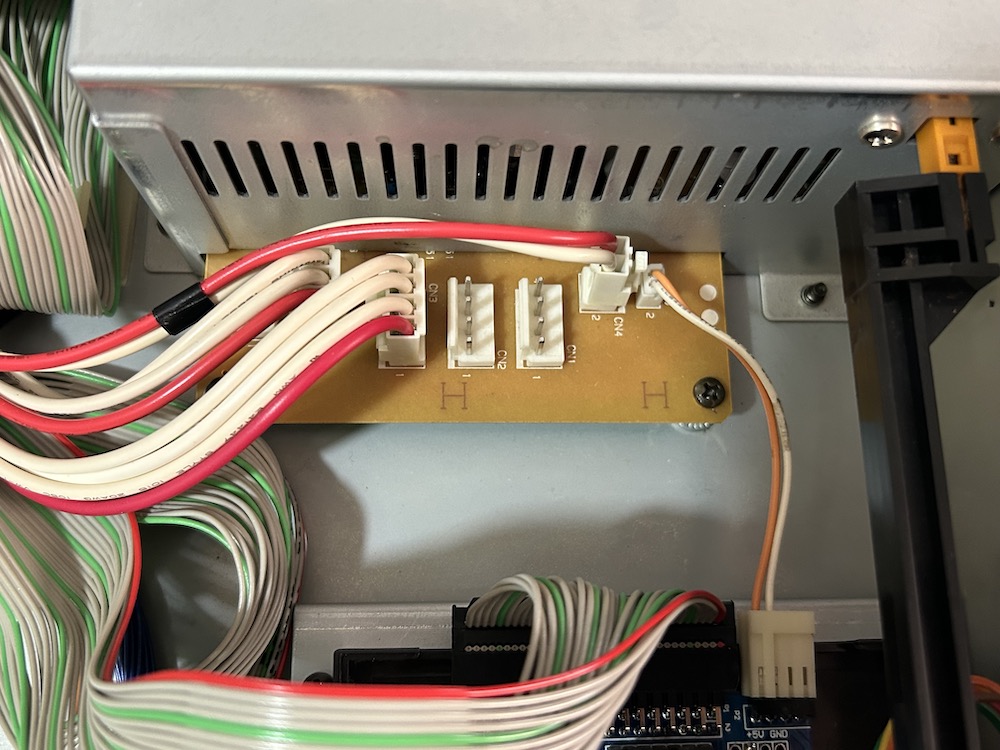
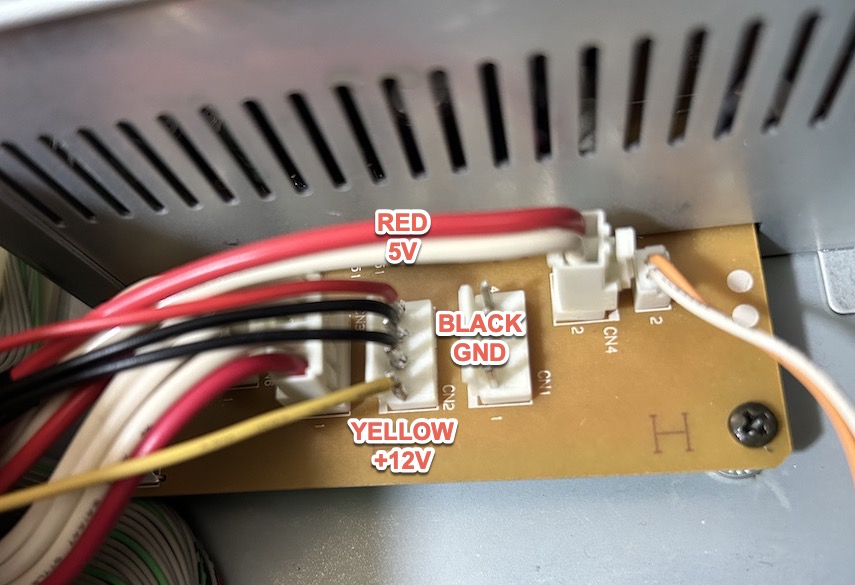
1) On the Yamaha A3000 there are a couple of "unused" connectors named CN1 and CN2. These are there to provide power supply for an internal Hard Disk or additional devices. They have all you need to power up your SCSI Hard Drive (and the original connector should be connected here).
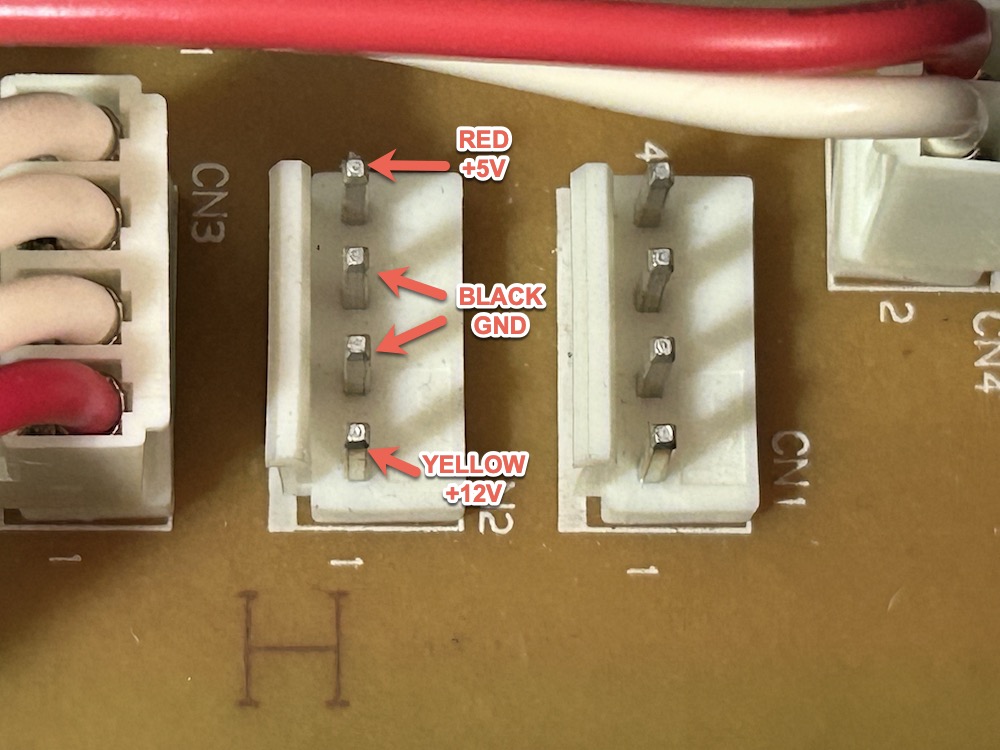
CN1 and CN2 are identical and they both spit out a +12V, +5V and GND. That's all we need to power up an Hard Disk drive. Just pay attention (see image below to the pins and their corresponding voltages)
2) I've got a bunch of old computer power supplies I kept just for spares so I simply cut one of the connectors for the Hard Disk power supply. They all normally have 4 wires: RED for +5V, BLACK for GND, YELLOW for +12V

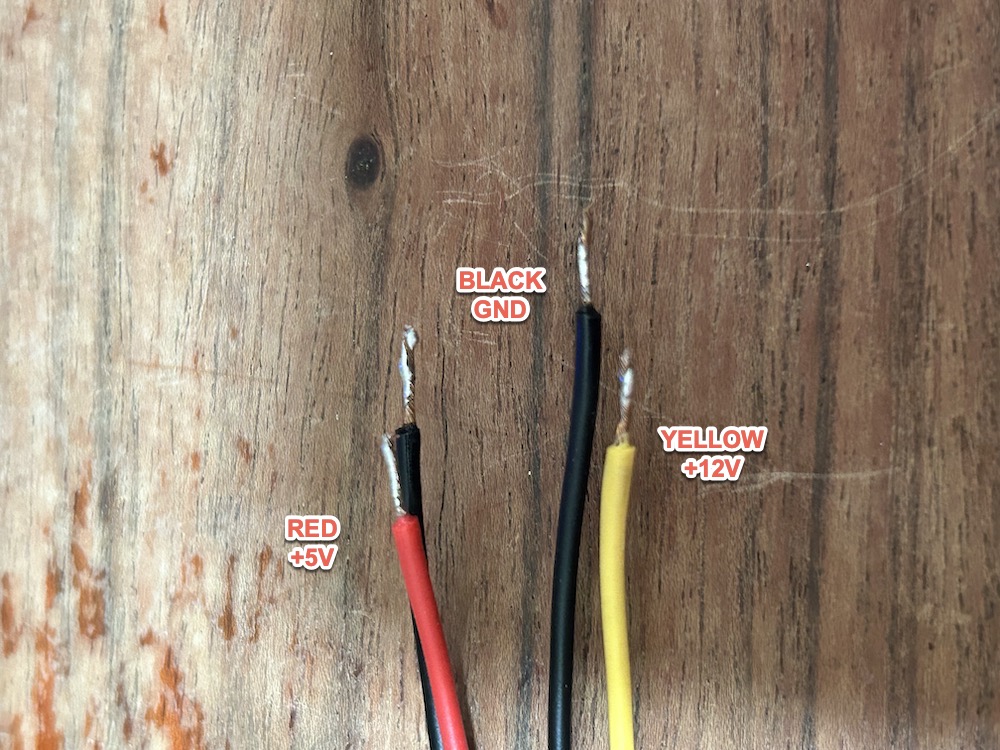
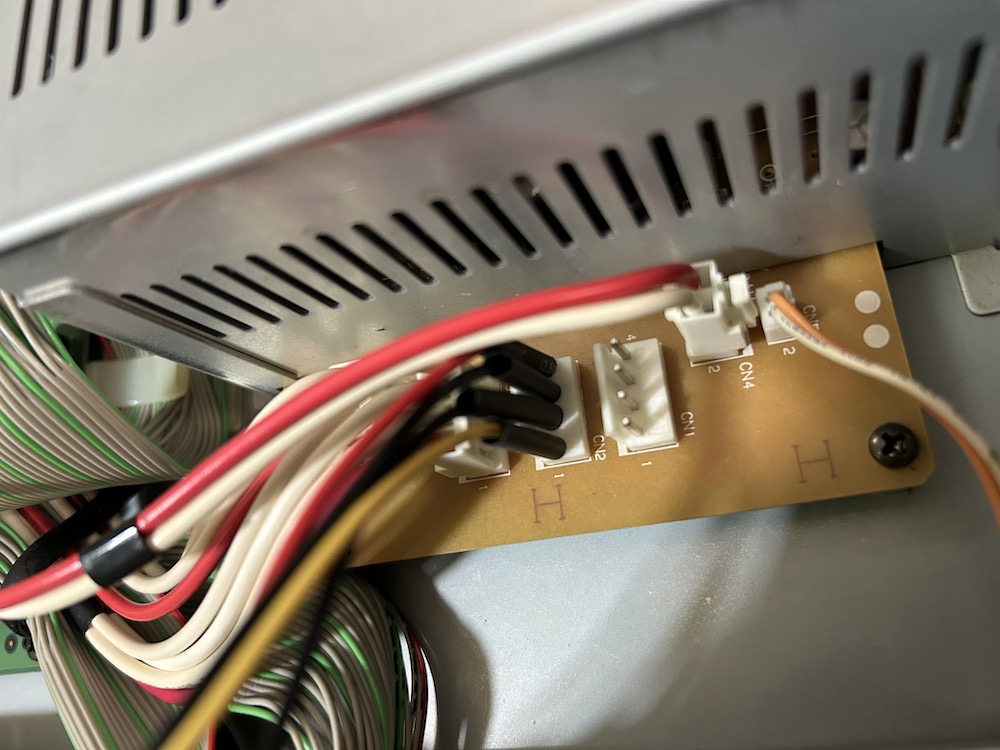
3) All you need to do at this point is to solder the 4 wires dircetly on the connector, just tine the wires and the connector plugs, then apply a nice amount of solder so that the connection is reliable and sturdy. Cover the solder with some heat-shrink tube to prevent them from moving around and shorting in case they will desolder. Double check again for the correct cable colors and voltages...
4) That's it. Your SCSI Hard Disk is nearly ready. You only need to connect the PSU, connect the 50-pin connector inside the motherboard and attach the Hard Drive to the bottom of the unit (ther are specific holes for that) using 4 M3 screws.